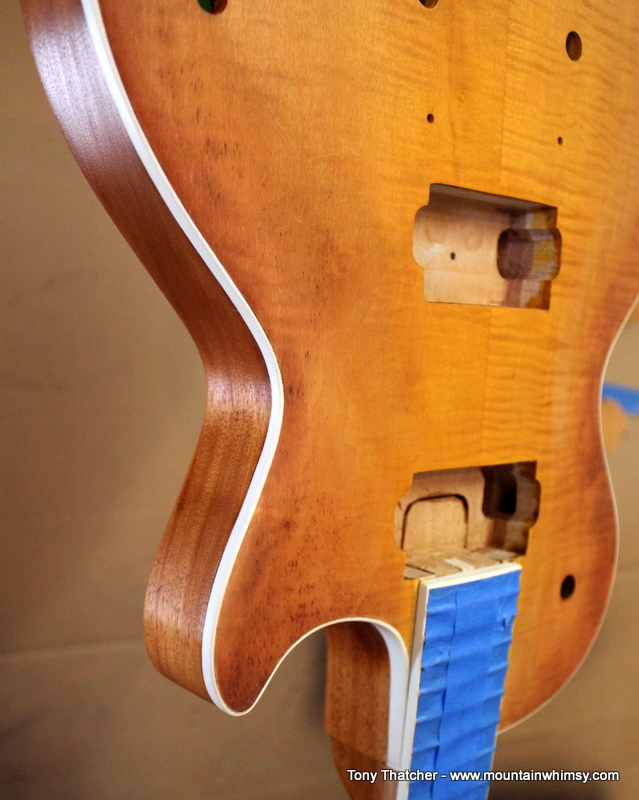
Though I have been finished with this project for a month or so, I still seem to have some catching up to do with the last couple of steps of the build.
I am a bit of a junkie when it comes to finish work. Not over the top obsessed, but I do like taking the time to get a nice finish. This was my first attempt at using a spray gun. I’ve watched enough videos and done enough reading to generally know how to go about it, but using a spray gun is definitely different than a brush. I was lucky enough to have some decent weather so I could keep some decent ventilation going in the shop. Low humidity helped too, but that is more the norm in Montana.
I broke down and bought the small spray gun from StewMac. I only have a small pancake compressor, so I didn’t want to have to upgrade to a bigger air source. It is a little under-powered for any real production work, but I was more interested in taking my time to get it right than in doing it fast. I could get a full pass on the front or back without the compressor kicking in. I then would wait for it to stop before making the next pass, so I wasn’t pushing it too hard. I also invested in an in-line water/oil filter and a flow regulator at the gun to try to up the odds that I would not botch the spray job due to contamination. It was not a professional set up, but it seemed to get the job done at a reasonable cost. I did not notice any issues with pressure, flow rate, or contamination, so I was pleased.
I used the Behlen nitrocellulose Lacquer thinned 1:1 with the thinner for all my coats. I experimented a little with using less thinner to get faster build up, but I am still not familiar enough with how thick you can spray before you risk runs. I opted for more thin coats. In the end, I put on about 15 thin coats over 5 sessions (3 coats per session). I used a full can of lacquer. I think I probably had the spray spread a bit wide and could have used more material flow through the gun in order to prevent overspray. This would result in less waste and a faster build up. I level sanded after the first three sessions. And again after the final coats and a week’s wait. Even with all those coats I did have a small spot of sand-through (you can see it in the photo below between the switch hole and the end of the neck pickup cavity). I left it as a beauty mark! Final sanding went down to 1500 grit wet and buffing/polishing using the StewMac Colortone buffing compounds. On other projects I have just used automotive polishes, but I wanted to try something different this time. The Colortone stuff certainly works well. Does it work better than less expensive automotive compounds? Who knows.


