My folks have gone home after a wonderful visit. Skiing is less than stellar right now. None of my clients are responding to emails. So that adds up to shop time!
I stepped back from trying to hand thickness the last set of acoustic sides, not to mention the three sets of backs and sound boards, in order to make a drum sander. And let me say, it is worth five times the effort! I just completed it yesterday afternoon and ran an extra piece of chechen through it and I am officially stoked!
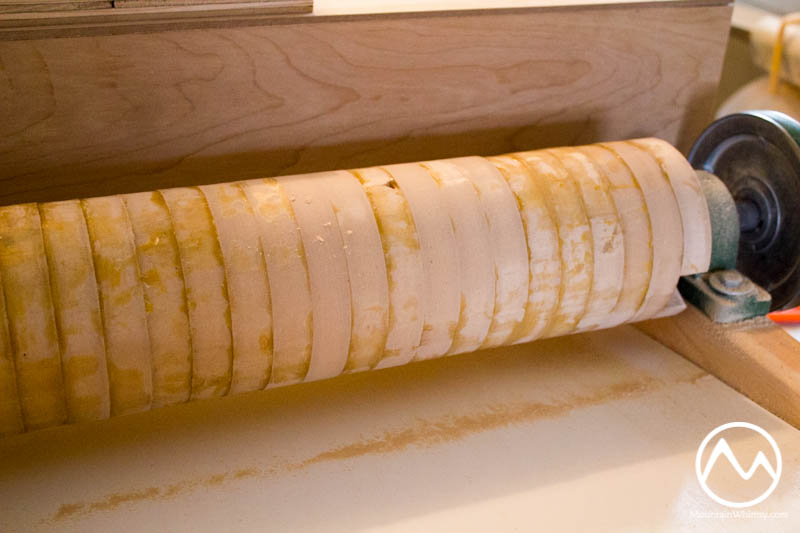
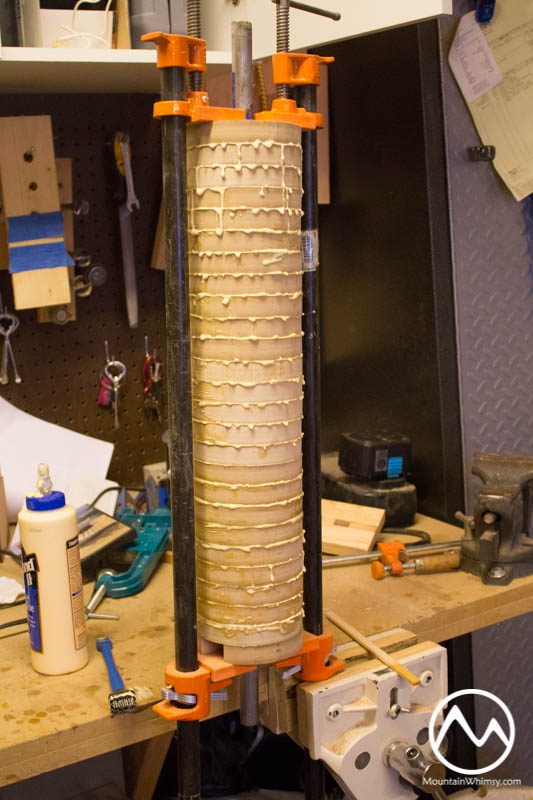
First up was making 26, 4″ disks for the drum. The band saw was mighty handy for this. These were stacked on a 3/4″ steel rod to make one heck of a layer cake. A pin is placed at each end to lock the drum to the rod. A nail makes a handy locking pin.

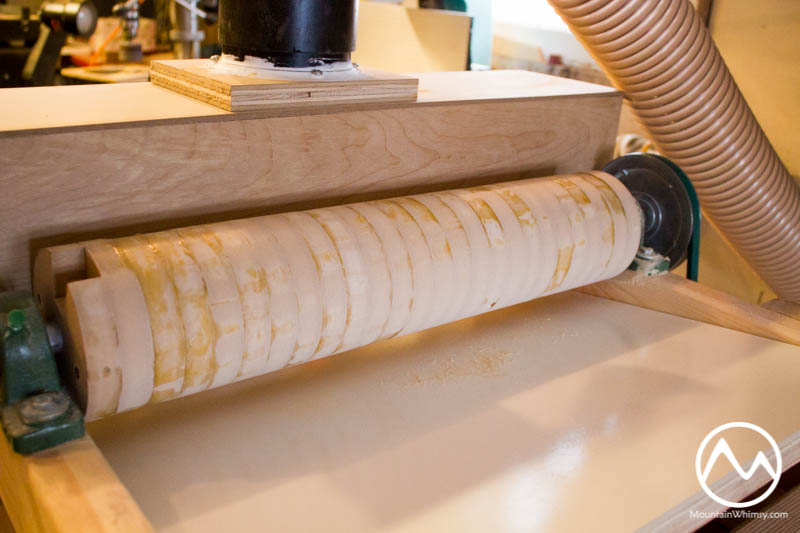
The drum is driven by the table saws motor. A small 4L pulley is on the table saw arbor, while a large pulley is on the 3/4″ rod. Two pillow bearing carry the drum on a simple frame made of 2x4s.

The bed is made of 3/4″ ply, with a 1/4″ melamine skin to make is nice and slick.
A dust collection hood is placed over the drum. And a rail is added to the base of the frame to lock into the T-slot on the table saw bed. This maintains the alignment of the pulleys. The belt is tightened by simply lowering the “blade”.
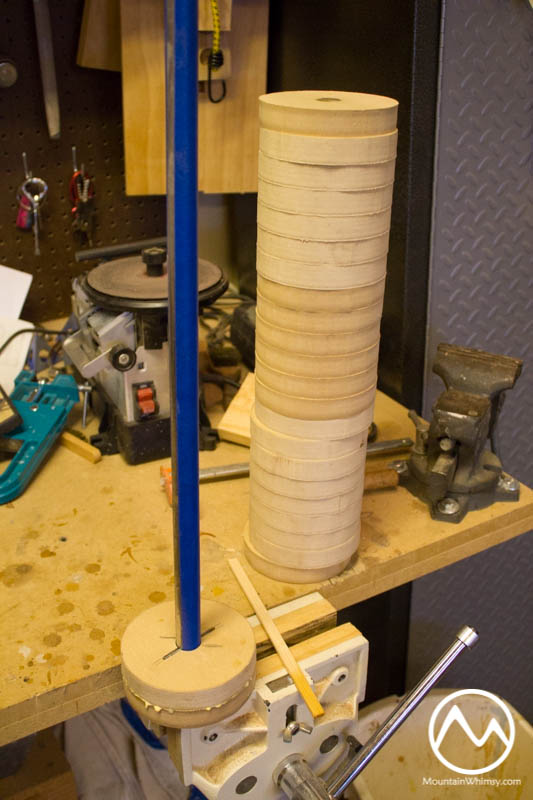
A piece of ply with some sandpaper is used to level the drum. Here’s a sequence of the drum being leveled.
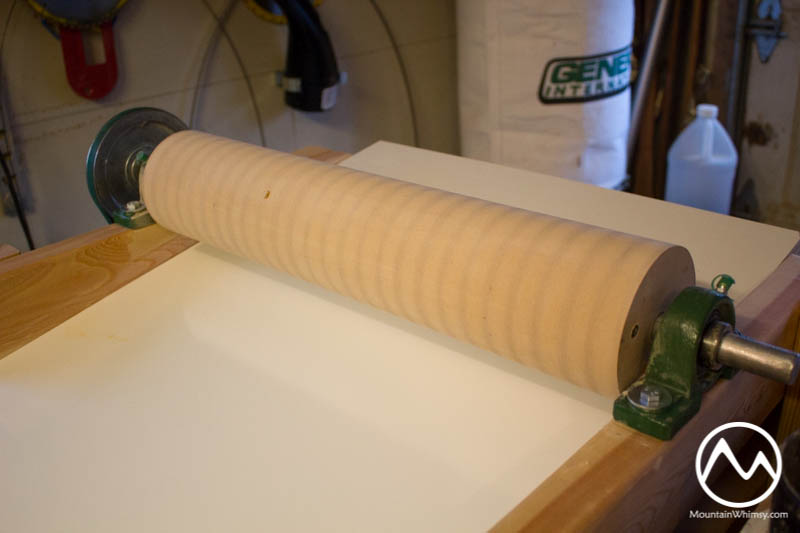
All assembled and the first test side is sent through the sander. Perfect! I was able to take off a hundredth of an inch at a pass. The side is the same thickness throughout. Almost no dust at all with the dust collection hood. Worth every penny. And it really only took me about 10 hours total to put together. If I ever want to move it to a stand-alone base with its own motor, it will be easy. I hardly ever use my table saw now that I have a good band saw, so this is a win-win all around.
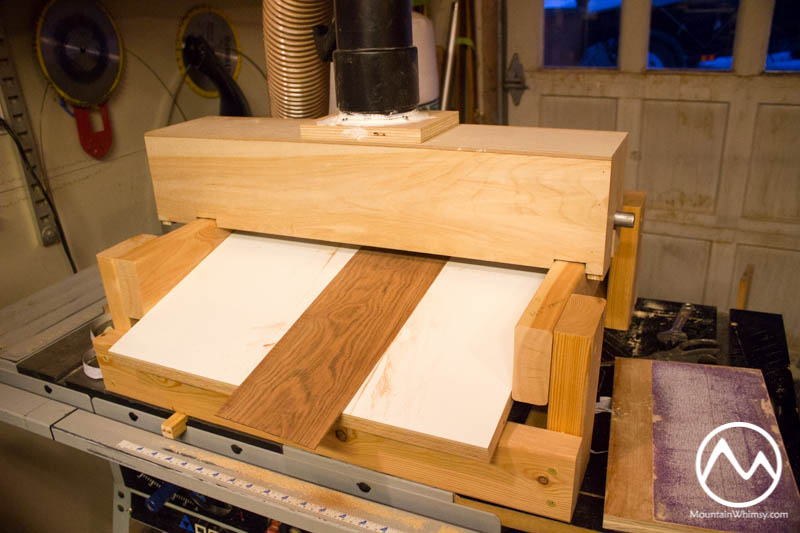
Now back to making guitars! I ran my last set of sides (Peruvian walnut) through the sander this morning and am very pleased. It took me about 30 minutes to bring both sides down from 0.15″ to about 0.085″. Doing the same by hand would have taken me 8+ hours of sweat labor. The walnut has just enough curl to make planing them to thickness impossible without some ugly tear-out. The drum sander did the chore beautifully! Just make sure you feed against the direction of drum spin AND hold onto your work piece. Feeding in the opposite direction could easily put your work piece through the drywall or window! No, I did not learn that the hard way….
3 Comments
-
Hello, I builed one my self that is almost finished, I just wanted to ask you how do you attache the sand paper to the drum, many thanks and congrats!
-
Thanks, Marc. I’ve used two strategies for attaching the paper. I started using 3″ wide roll paper with an adhesive back. The ends were secured using black electrical tape. This worked fairly well, but the paper was expensive and it was difficult to change the paper to a different grit without throwing away good paper. So I switched to using, I believe, 4″ x 48″ (or it may be 4×36″) belt sander belts. In the photos of my sander you’ll see a notch cut in the last disk at each end of the drum. This is to hold the end tab of the sanding belt. I have a little block that fits in the notch and is held in place by a screw that runs through the block and into the drum. The trick is getting the paper wrapped tightly before securing the ends. This system works out well. The heavy duty belts have a cloth backing that keeps them from stretching. And they are pretty easy to change out. Hope that helps!
-

