 All wood has personality. A set of characteristics that make it unique from other species. Colors, textures, and smells, mix with weight, stiffness, density, and grain to define the working properties for that species. Learning the subtleties of each species is one of the most enjoyable aspects of any woodworking project. Alaskan yellow cedar has a sweetness in smell and a creamy texture that makes it easy to tool and a pleasure to work with. Ash is stiff and dense making it ideal for things like boat gunwales. Alder and cherry have wonderful grain, take stain well, and are great for furniture or cabinet work. No matter the project, I love walking into the shop and smelling the flavors from the latest project.
This guitar uses primarily mahogany and maple for the body and neck. I’ve worked with both of these before on other projects so there are no surprises there. But the rosewood fretboard is a new one for me. Rosewood is a fairly dense, oily wood with a dark, reddish-brown appearance. You need some sharp tools to work with it, but it carves beautifully. In doing the inlay recesses, I routed out the majority of the cavity with the Dremel router before cleaning up the edges with a small, sharp chisel and exacto knife. I found I could slice off clean slivers easily and achieve tight fits for the inlay.
But, as I was using the Dremel, what really struck me was the smell. Rosewood has a fantastic aroma that reminds me of a cross between dark chocolate and pipe tobacco. I kept flashing back to childhood memories of my mother’s chocolate chip cookies and my father’s pipes. I could imagine opening up the flap on my father’s light-tan leather tobacco pouch and seeing it filled with the chips and sawdust from the inlay routing. Or a fresh batch of cookies coming out of the oven made from rosewood flour. Very nostalgic.
Unfortunately, that phase of the build is over. I completed the inlays yesterday. Hopefully I will get another flash of chocolate tobacco as I taper the fretboard, but I anticipate it will be fleeting.
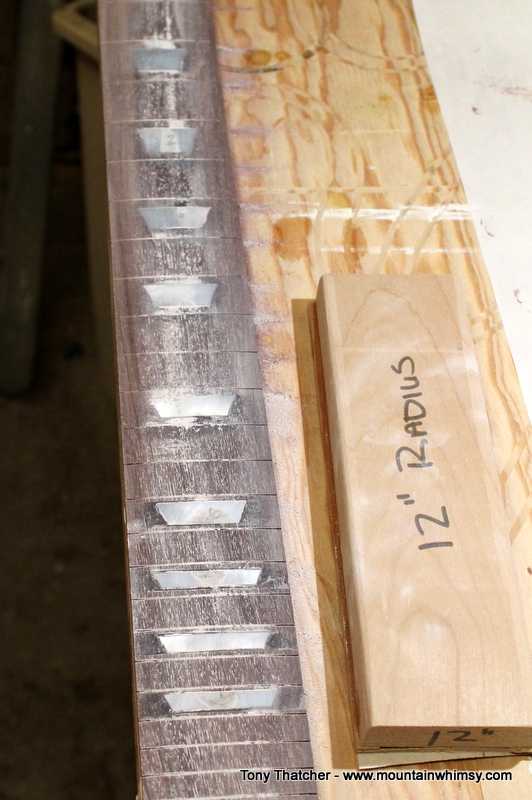
To finish up the inlays I started by creating a radius sanding block. I could pay anywhere from $15 to $50 for a commercial version, but I was able to create my own for free in about 15 minutes. The key was using the pre-radiused fingerboard as a sanding template. The photos below pretty much show how I went about it. The result is a more-than-adequate radius sanding block.
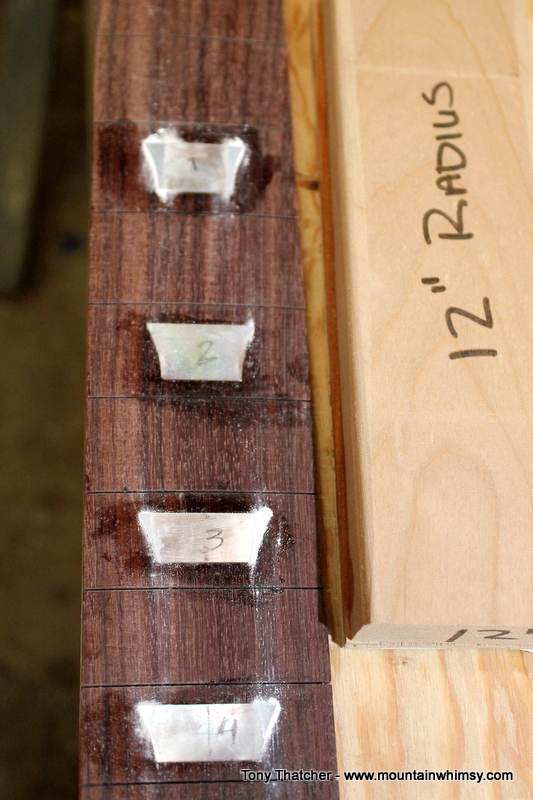
Next, I glued the mother of pearl inlays in place using 5-minute epoxy mixed with a little sawdust from the fretboard. This filled in any of the gaps around the edges of each inlay. Once the epoxy cured, I used the sanding block to level the inlays to the fretboard. You can see in the photos how the sanding started by taking off the outer edges of the inlays where they sit most proud of the fretboard. As the sanding progresses, more and more of the inlay is removed until you are sanding both the inlay and the fretboard at the same time. I started with 220 grit, then worked by way up with wet sanding using 320, 400, and 600 grit. Not bad for my first shot at inlay.
1 Comment
-
It’s going to be beautiful. Anxious to see the project develop.
I still have the pipes and light tan tobacco pouch. Haven’t smoked in years, but I am tempted by the pipes. Maybe one day ? ? ?


